Setting up the mechanism to access your home network from the Internet is straightforward and often available as a free service.
You could simply determine the IP address your Internet service provider (ISP) has assigned and use that address from anywhere you happen to be.
This is quick and easy.
Problem is…your ISP may change this address at any time, and if you are away from the home network, it will be difficult to determine the updated address. So you become cut off from your home network.
To resolve this issue, a DDNS (Dynamic domain name server) account is needed. A DNS simple resolves a domain host name to an IP address. Using a dynamic DNS updates the IP address that the domain name points to whenever it changes…automatically.
DDNS Providers
There are both free and fee based DDNS accounts available. The following lists some of the options currently available. If you don’t like any of these, just do a google search for DynDNS providers.
[wptg_comparison_table id=”2″]
The instructions for setting up these accounts are typically quick and simple. You pick a domain name, one of your choice, and this name will likely have a suffix appended to it. This part is selected by the provider. This is a very small price to pay for a FREE service. Then this name gets synchronized with your current network IP. That’s it.
Setting up the router for port forwarding
You will undoubtedly have more than one device to connect from your local network to the Internet. But there is only one IP assigned to your network. So how can the traffic initiated from your DDNS domain name, which resolves to your Internet IP, know which device on your network to deliver the message to?
Simple-Ports…
Think of the IP for your Internet connection as a post office and the ports as the individual boxes.
The connection to your device will almost certainly use Transmission Control Protocol (TCP). And TCP identifies the destination by port number. The valid range is 0 to 65535. So for each device on your local network, a port needs to be assigned for delivery of packets from the network.
The key to making this work is to configure your router to forward packets from the Internet to the intended recipient, that is, the destination port. Hence, the name port forwarding.
While this is not too difficult to set up, the step-by-step directions for port forwarding are unique for each router. That is simply because router firmwares are all different. The setup is typically found in the firewall settings. Here is how to do in with a D-Link DIR-625 router. Just 3 simple steps. 1-2-3… Your router should have similar options for setting up port forwarding:
Port forwarding a D-Link DIR-625
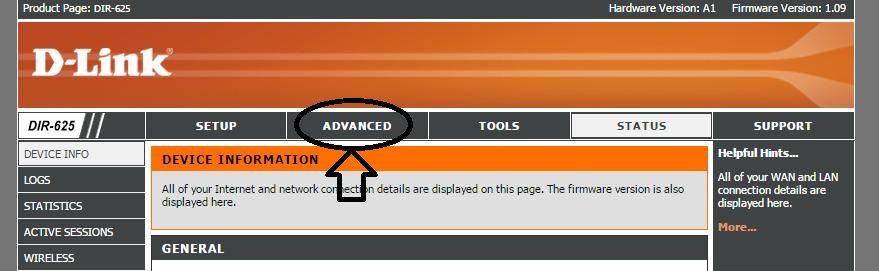
1. First, select the ADVANCED menu item from the initial router screen.
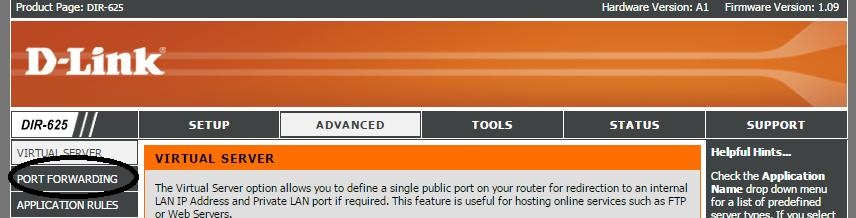
2.Next, click on the PORT FORWARDING tab.
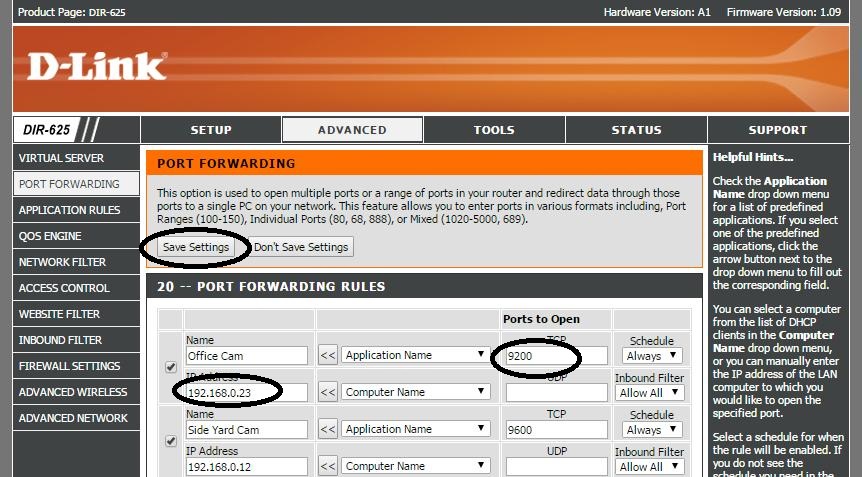
3. Now all you need to do is identify your local network device by IP, assign a port to it, and save your configuration.
My ISP is AT&T U-verse. Setting up the router they provide for port forwarding was not so obvious, at least at first glance. Since this is such a popular home router, I am also providing port forwarding setup instructions here.
Port forwarding an AT&T NGV-589
Now the AT&T router configuration for port forwarding is a bit more tedious. I’ve broken it down into the following 8 steps.
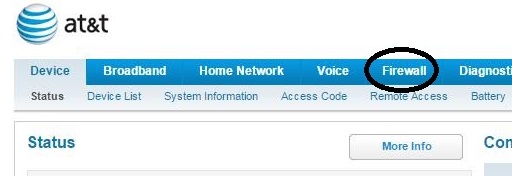
1. Access your router’s main web portal page and select the Firewall tab.
2. Select NAT/Gaming.
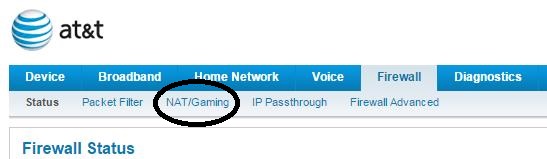
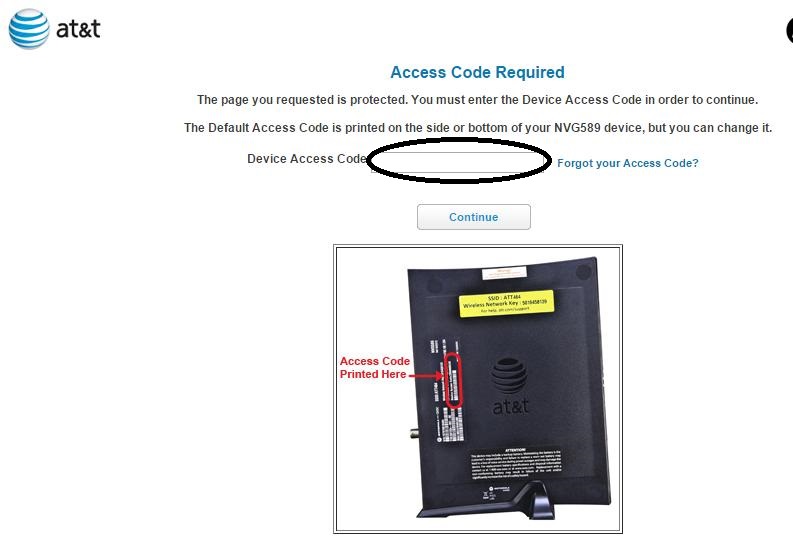
3. You’ll then be instructed to enter the router access code.
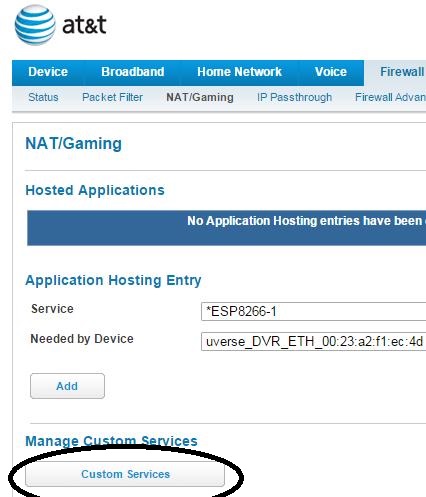
4. Now, click on the “Custom Services” button.
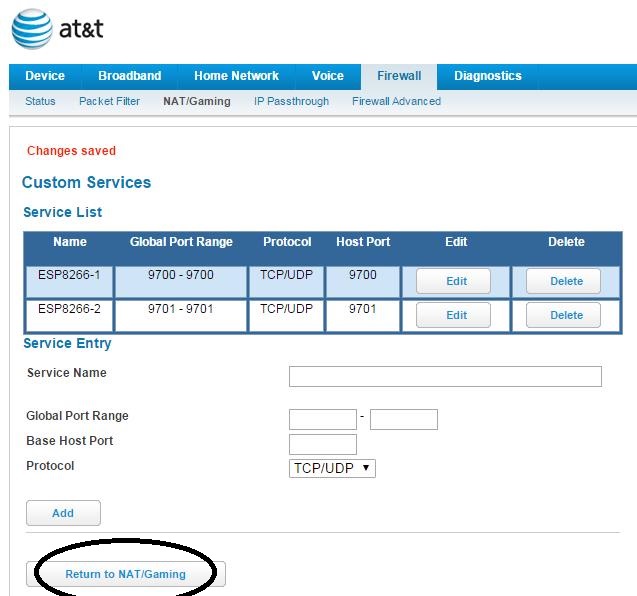
5. Alas, we have now arrived at the screen to identify the port! Here, enter a name for your device and the port number(s) you with to assign to your device. In this illustration, I have assigned port 9701 to my second ESP8266. Click on the Add button to include this port/device(Service Name) to the router’s list.

6.The entry should now appear in the Service List. Next step is to click on the “Return to NAT/Gaming” button.
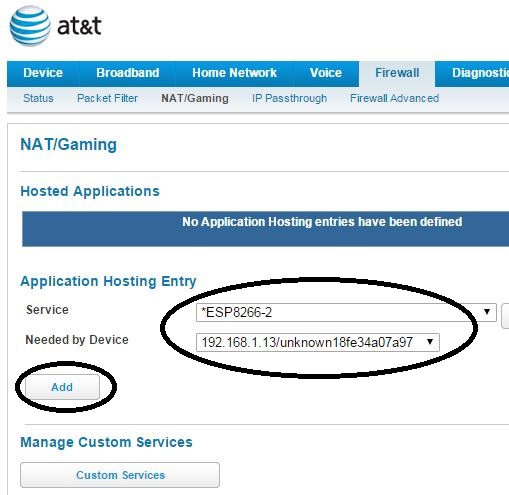
7. Now, Select the Service that was just defined (ESP8266-2) and the needed by device. You should see your needed by device in the drop-down list by the IP that it has been assigned. The device MAC is also shown on this list. Click on the “Add” button to complete the port forwarding setup for your device.
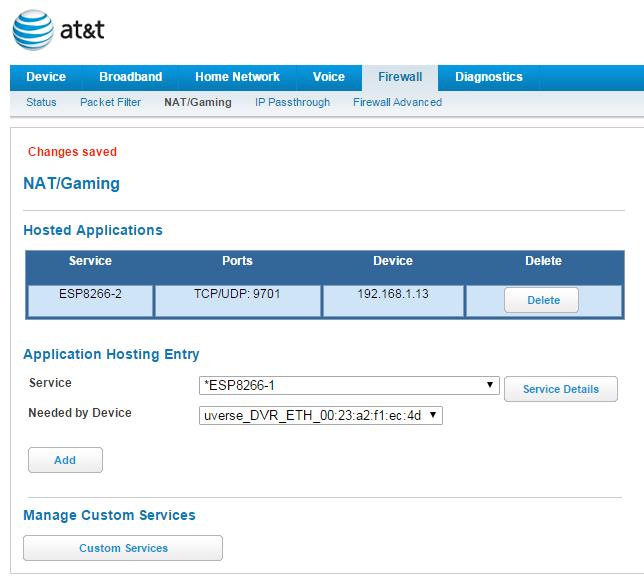
8. Your router’s “Hosted Applications” list should now display the device that you have just configured for port-forwarding.
NOTE regarding the AT&T NVG589: I have experienced issues with my router which did not allow me to access devices locally. While not universal among all users, I am not the only one to have this problem. This appears to be an issue with the router’s firmware, which did not appear to have a solution.
My answer was to use my own router and put the AT&T router in pass-through mode. If anyone has experienced similar problems, that would be my recommended solution. While using 2 routers was not particularly appealing, it does work. Allowing you to move on to other things…
In Summary
This should de-mystify port forwarding. Some routers require more steps than others to accomplish the same thing. Simple, yet this is an essential step to connecting your things to the internet.
Hope you find this information useful…