Archives for ThingSpeak

ThingSpeak Channel Data With More Than 8 Fields

thingspeakchannel

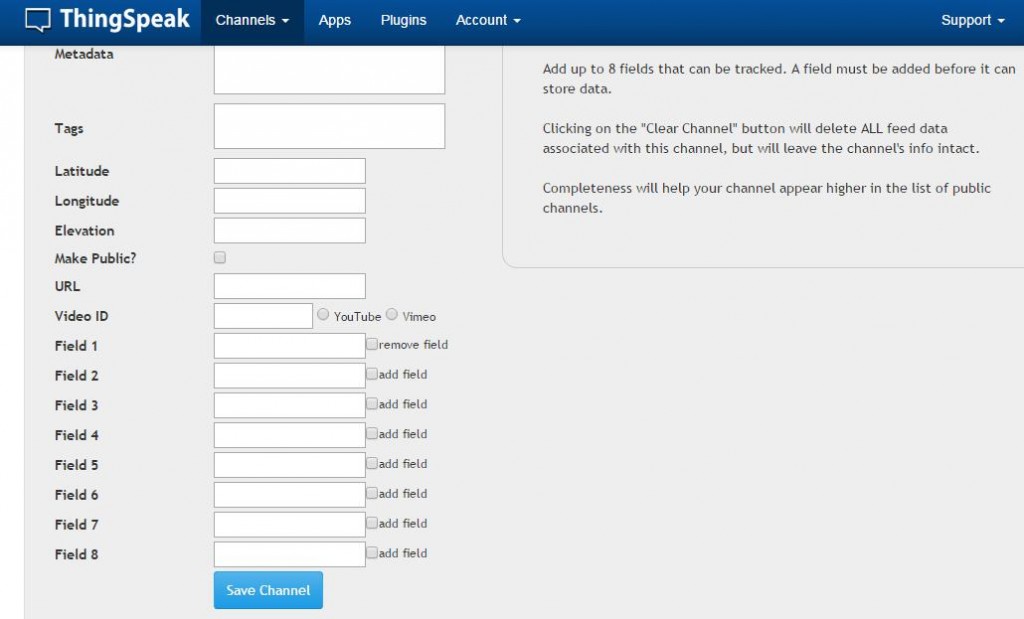
Are you using ThingSpeak to capture and save your IoT device data points? Ever felt constrained by the 8 field channels limit?

I was.

All 8 of my channel fields were in use. None could be deleted. And I needed to save one additional value. But the solution was quite simple and straight-forward. This short post will serve as a reference “note to self”, and perhaps others who may stumble upon this issue…

A Simple Solution

First of all, as noted, I needed more than 8 fields in my channel’s data set. But a ThingSpeak channel is limited to 8 fields.

Hmm, what to do?

While you are limited to 8 data fields, a channel is not constrained by it’s own channel data. So the answer is right there…just add another channel and you get another group of 8 data fields. Since the additional data fields can be accessed from any of the master channel’s “plug-in” webpages, you have just doubled the number of  entries in a single record, from 8 to 16. There is really no limit to how many channels that can be added, scaling the data set upward by 8 fields for each channel added.

// set your channel IDs here
var channel_id1 = 12345;
var channel_id2 = 12346;
var channel_id3 = 12347;
// set your channel read api keys here
var api_key1 = '9XXQ4X79WQJC72SZ';
var api_key2 = '2KJQ2Q82YTPA23CQ';
var api_key3 = '5SWQ9F87UULD86NB';

function getData() {
//Get Data Set 1
$.getJSON('https://api.thingspeak.com/channels/' + channel_id1 + '/feed/last.json?api_key=' + api_key1, function(data1) {
    //Get Data Set 2
    $.getJSON('https://api.thingspeak.com/channels/' + channel_id2 + '/feed/last.json?api_key=' + api_key2, function(data2) {
         //Get Data Set 3
         $.getJSON('https://api.thingspeak.com/channels/' + channel_id3 + '/feed/last.json?api_key=' + api_key3, function(data3) {
             //Do something with the data here

             //Save the maximum of data1.field2 and data3.field4 in data3.field4
             if(data1.field2 > data3.field4) {
                 maxvalURL = "https://api.thingspeak.com/update?key=" + api_key3 + "&field4=" + data1.field2;
                 $.post(maxvalURL);
             }
         });
    });
});

Note the nested jQuery “$.getJSON” to retrieve the ThingSpeak channel data. All processing needs to be performed inside the inner nest in order to keep the values in scope.

And then there was the need to capture a value that could reset, potentially anytime. In my case, one of the requirements was to save a maximum value. This value represents the device run time since it last reset. It provides a measure of the systems reliability. In the above code example:

current-run-time-since-last-reset = data1.field2;

saved-max-time-since-last-reset = data3.field4;

Instead of retrieving a constantly growing array of values from a ThingSpeak field and then evaluating the array for the maximum value, the current max value is compared against the last run time value stored. This simple running “max value” algorithm runs faster and requires minimal code.

Conclusion

Scalable ThingSpeak data sets. This short post should serve as a reference…a reminder of just how simple and obvious it is to expand your sensor data beyond the 8-field limit imposed on a ThingSpeak channel.

I hope you find this information useful…

Loading

Share This:
FacebooktwitterredditpinterestlinkedintumblrFacebooktwitterredditpinterestlinkedintumblr

My ESP8266 Controlled Temperature Sensors now on ThingSpeak

Now that my ESP8266 controlled sensors have been on-line and are now reliably running, the next step was to push some of the data up to ThingSpeak. Up to now, I had been saving the readings exclusively in my host server account’s mySQL database.

And now the temperature readings are also pushed up to ThingSpeak, once every hour.

But not by the ESP8266 micro-controller. No…I have discovered that the stability of the ESP8266, at least at this time, is linked to the frequency of accessing it through http client GET requests. Access to my ESP8266 is tightly controlled. It has to be. I’ve written about structuring a stable ESP8266 Arduino IDE sketch loop() in another post. This may be helpful if you are have issues with the ESP8266 reliability.

The video created to describe the ThinkSpeak channel breaks down the unique methodology I’ve used to move sensor readings up to ThingSpeak.

You can check out the real-time data now visually served to the world on my new ThingSpeak channel. I’m hoping there is something unique about the method used to upload the readings and the eye-catching displays that could be of value to someone. Something not found on any other of the many channels displaying similar data.

Setting up the channel was easy. ThingSpeak is a free platform serving first as a repository database, like mySQL, to store data read from your Internet of Things (IoT) gadgets.

Once you have a periodic data feed to ThingSpeak, the platform can execute actions based on the data. It also provides a simple API to take some of the burden off your micro-controller. Here’s highlights of what ThingSpeak can do for you:

  • ThingTweet – This service provides a simple API for your IoT thing to post Twitter messages.
  • React -Performs whatever action you need when the data in your channel meets your custom set condition. Some obvious examples:
    • Turn light on when proximity sensor detects someone in room
    • Water lawn when moisture detector reaches dry threshold.
    • Turn heater on when temperature drops below certain reading.
  • TalkBack – API that has device execute queued commands. The queue is loaded in ThingSpeak. Then the device request a command, and performs an action based on the command it gets from the ThingSpeak queue. I have not thought of an application for this yet, but I’m sure you might find some from ThingSpeak.
  • TimeControl – Allows you to setup ThingHTTP or ThingTweet requests a a predetermined time. There are many ways to do this, but using ThingSpeak could reduce the burden placed on your device or other element in your IoT ecosystem.

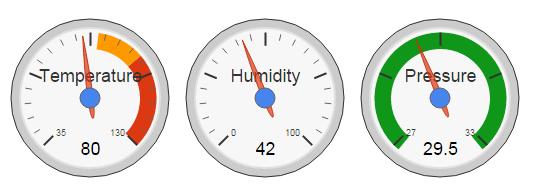
Temp Humidity Baro-Pressure

That’s it for now. Keep your creative juices flowing. I may add my humidity and barometric pressure readings to the initial ThingSpeak soon – in a 3-gauge display window. Like you see above. Being in the US, my temperature is in Fahrenheit and the pressure is inches of mercury. What will you do next?

I hope you find this information useful…


Loading

Share This:
FacebooktwitterredditpinterestlinkedintumblrFacebooktwitterredditpinterestlinkedintumblr