I was really excited when first discovering the ESP8266. Imagine…a tiny footprint device capable of connecting to the internet with a WIFI connection. With the capability to control ‘things’ and monitor sensors. A genuine SoC (System on a Chip). And best of all…for a price under 5 USD.
I was determined to make this as low cost as possible. So I found an inexpensive Asian supplier and ordered a lot of 5 of them for $2.68 each. And FREE shipping.
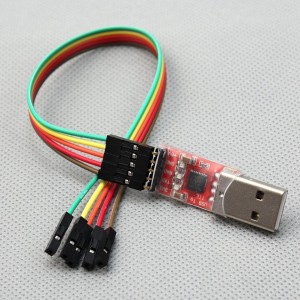
But I knew the delivery would be slow with these terms so I researched what else was needed. A USB to serial converter was the only other thing essential to getting started. This would be used both for programming the ESP8266 and providing it with the required 3.3V power source. Another search netted a supplier of these at $0.64 each (minimum order of 10).
Hmmm…if this works, throw in a couple of sensors and stuff and we what we have is still a very low-cost solution to internet-enable something—perhaps EVERYTHING!
It did take a while for those ESP8266 devices to arrive…46 days from the order date. But hey, with all my other “irons in the fire”, this was not even an inconvenience.
So when the hardware arrived, I started to search for a simple way to get started. What I found was that there are many variants of the ESP8266, and they do not all behave exactly the same. I had ordered the ESP8266-12 models. These were 16-pin devices and all the information I found was for the earlier designs, the 8-pin variety. And yes, there is an important set-up for the ESP8266-12 that was not mentioned for the earlier units.
The purpose of this document is to provide a ‘getting started quickly’ guide for the ESP8266-12. What’s great is that almost all of the steps also apply to the earlier versions.
The ESP8266 is an open-source device with bits and pieces of the puzzle scattered about. Piecing it all together can be somewhat challenging. I hope the information presented here makes it possible for someone to get started quicker and easier than I did, without needed to jump elsewhere for missing pieces.
Getting started with the ESP8266 breaks down into five steps:
Step 1: Connecting the hardware
This is a list of all the components I used to get started:
- ESP8266 module
- USB to Serial converter
- 3.3V 1A Power Supply
- Capacitor (4.7uf)
- LED
- Resistors (10 kohm (3), 330 ohm, 100 ohm)
- Zener Diode (3.3V)
- Breadboard
- Jumper wires
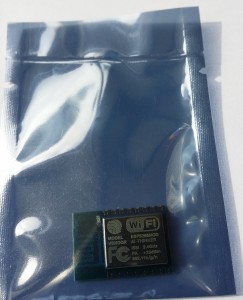
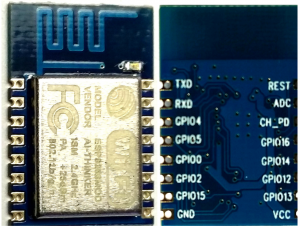
The ESP8266-12 units were delivered in sealed ESD bags. No headers were installed on the printed wiring board. But a bigger issue was that the centers between each pin (8 on each side) are 2mm. That is tighter than the 2.54 mm of a standard breadboard.
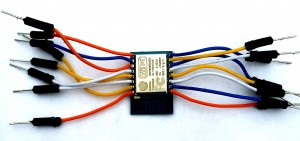
First challenge was to make the module mountable on a breadboard. Anxious to get started, I took the quick and dirty route and simply cut 8 breadboard jumpers in half, enough for 16 signals. The cut end was stripped and soldered to the ESP8266-12, one wire on each of the 16 holes. This got me started quickly without needing anything extra, like a separate perforated board to break-out the signals. Not pretty, but it’s working just fine for initial prototyping.
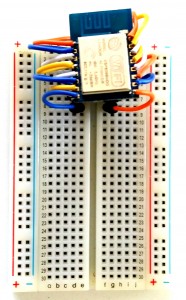
The “jumper-ed” module mated easily to a breadboard.
I would have used shorter jumpers if I had make this setup again. With tighter connections, the jumper pins would have connected to the breadboard somewhat cleaner; almost straight down from the module. But then, this is just a quick-start setup and has proven to be quite reliable.
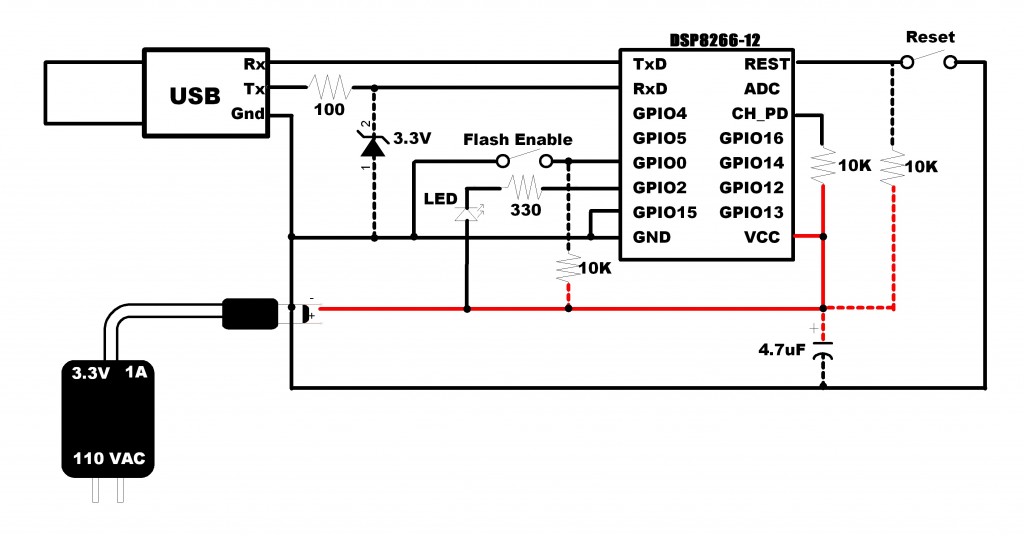
As an initial test, a simple flashing LED will be coded. As shown below, the hardware needed for this is minimal. Note that GPIO15 must be grounded. That fact was not stated in much the information available on-line regarding this module. The unit will simply not work without this connection. I hope this saves someone from the initial grief I went through prior to properly configuring GPIO15.
A few notes regarding the circuit:
-
Components connected with ‘dashed’ line are optional but recommended for reliable operation.
-
Connecting GPIO0 to ground should only be made when flashing the ESP8266. It is shown with a switch in the path, but simply adding this connection as a breadboard jumper when flashing is adequate.
-
During development and testing, there will be times when you will ant to reset the module. This can be done by momentarily connection a jumper from REST to ground.
-
The 100 ohm resistor and 3.3V zener diode from the USB transmit signal to the ESP8266 receive protects the ESP8266 from potential damage from exposure to 5V. The module is not specified to accept any inputs greater than 3.3V.
-
It is a good practice to have a capacitor across the power rails near the active components. The 4.7 uF capacitor I used is larger than what is needed for this simple circuit. I suggest using one greater than 0.1 uF.
-
A separate 3.3V power source is needed. Do not use the USB 3.3V output.
To be honest, my initial set-up did not even include the external power supply. I was using the 3.3V provided by the USB to serial bridge (top contact of red device above). But the performance was intermittent. Sometimes it would fail during a flash, and the unit would often freeze it’s activity after a short time running. These problems were eliminated after using an external supply to power the ESP8266.
The problem is that the USB bridge’s 3.3V output provides insufficient power. The current tops out at 100 ma while the ESP8266 can require more than 200 ma. I recommend that you save yourself some headaches; USE A SEPARATE 3.3V POWER SUPPLY.
Slow boat from China
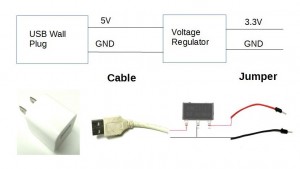
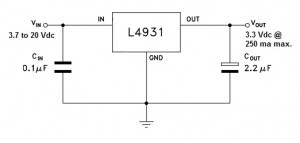
Another power supply option: Almost everyone has a few 5V USB wall plus for various uses. And who doesn’t also have one or more USB cables that no longer charge properly? These cables, along with a cheap 3.3V voltage regulator offer an inexpensive way to satisfy the ESP8266 power requirements. I have found a supplier selling regulators, model LM1117, for 0.04 USD each, but you have to order a minimum of 100, a lifetime supply for 4 USD…and this includes free shipping). Only catch is that it will take about 45 days to receive the goods on that slow boat from China).
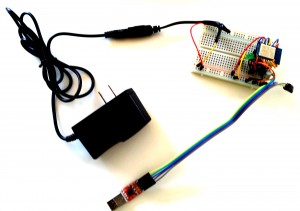
Here is what my test setup looked like after all the jumpers were in place:
Step 2: Install the USB to serial device driver
If you have already have a working serial interface, you can skip this section and move on to step 3.
There are many USB to serial devices available that will work well to program the ESP8266. If you do not have one already, you simply need a serial port with 3 signals:
-
Transmit
-
Receive
-
Ground
The one I selected provided 3.3V output. At the time, I thought this was essential, thinking that it would be needed to drive the ESP8266. But now, using an external supply for the 3.3V source, this voltage out of the USB to serial module is not necessary and is not used.
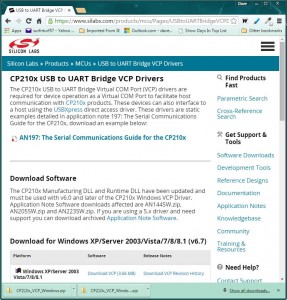
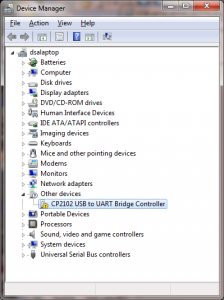
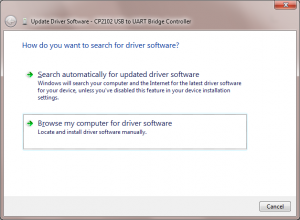
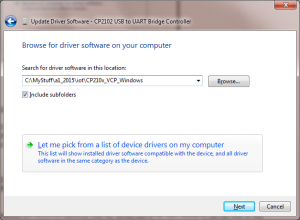
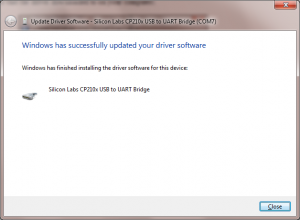
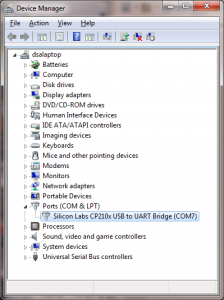
Just follow the instructions for your serial port to install the drivers. Installation for my device, which is based on a CP210x chip, is provided in a separate post.
Step 3: Verify the unit is functional
We now have the hardware setup established. Let’s make this thing work. Here is where things start to get interesting.
First, connect the USB to serial device to your computer and plug in the power supply. If the ESP8266-12 is functional, you should see the blue led flash twice when the power is applied. Great, this is the first confirmation that the unit is alive.
What is needed now is a method to verify the unit is functional, the ability to develop code and to flash the unit with code. Here we go…
First, open up your favorite terminal program such as putty or tera-term.
Start-up by applying power to the unit, or connect and release a jumper from REST to ground with a powered up unit.
Expect the blue led to flash twice on start-up.
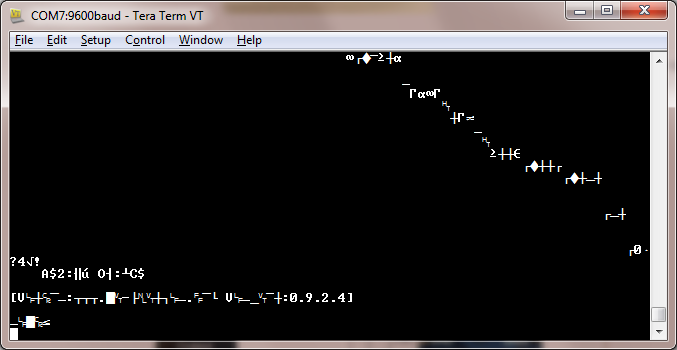
Note that start-up output at the terminal windows is garbage at both 9600 and 115200 baud. I tried this at all baud rates from 110 to 921600…none of these rates resulted in a recognizable output.
This suggests that the unit is not shipped with firmware. To get started then, you will need to get the AT command set firmware and flasher. There are many sites that have it. I got my copy here.
Knowing that things change over time, it is suggested that you do a search for “ESP8266 flasher” if it is no longer at the site mentioned.
Flashing the AT command firmware
Now let’s flash some firmware:
-
Ground GPIO0 and start-up or reset device.
-
You should see the blue LED flash once.
-
-
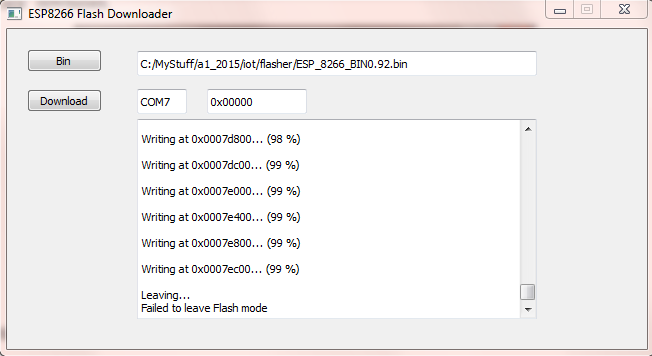
Run the executable “esp8266_flasher.exe” that was just downloaded.
-
Click the “Bin” button to select the downloaded firmware (ESP_8266_BIN0.22.bin).
-
Enter the COMx number assigned to your serial port (mine was 7).
-
Click “download.
When the download finishes, you will see “Failed to leave Flash mode”
Ignore this and close the downloader program.
Remove the GPIO0 to ground connection.
Reset the ESP8266: You will see two blue flashes again (the second flash is dimmer than the first).
The firmware is running at 115200 now and should respond to AT commands.
The most basic command to verify the firmware:
Enter “AT<enter>”
ESP8266 response: OK
The complete AT command set can be found here.
If you plan to use the ESP8266 as a slave to an Arduino or other MCU, you are ready to go.
But if you are planning to use the ESP8266 as a stand-alone prototyping platform, read on…
Step 4: Flashing NodeMcu
NodeMcu is open-source firmware for the ESP8266 which makes it easy to prototype “things”. It is similar to the Arduino development environment.
More information is available here.
Let’s set up the ESP8266 for NodeMcu.
First, pull the Flasher and firmware from GitHub:
Click on the “Download ZIP” file to get the entire package.
I used the 64-bit version for my windows 7 PC. It was in the repository at:
nodemcu-flasher-master\Win64\Release\ESP8266Flasher.exe
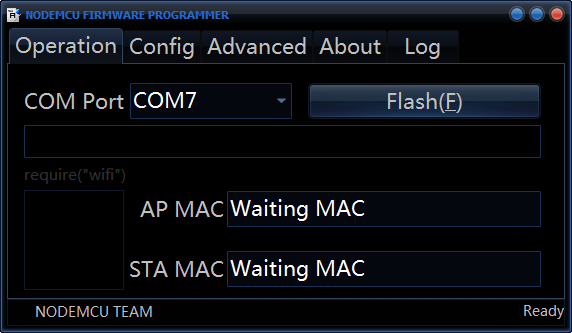
Before starting this program, make sure the GPIO0 is connected to ground. Then start the flasher program which should start up with:
The COM Port should be the same one you have been using to communicate with the ESP8266.
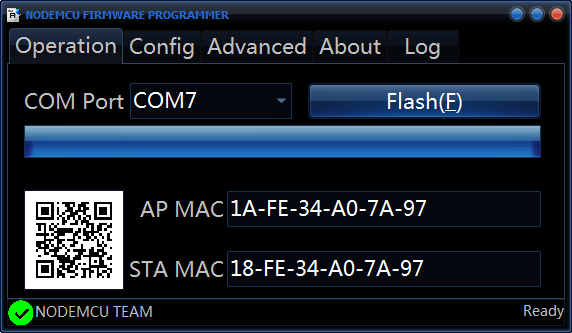
Click on the “Flash(F)” button to flash NodeMcu on your device. This will take a few minutes. You will see the progress bar fill and the ESP8266 blue LED blink during the flashing. A green Check will be displayed when the flash is completed.
Once the flash is complete, you can remove the GPIO0 to ground jumper. It will no longer be needed. All that you will need now to develop your own applications is an integrated development environment (IDE).
ESPlorer appears to be the most widely used ESP8266 IDE. Get it now here.
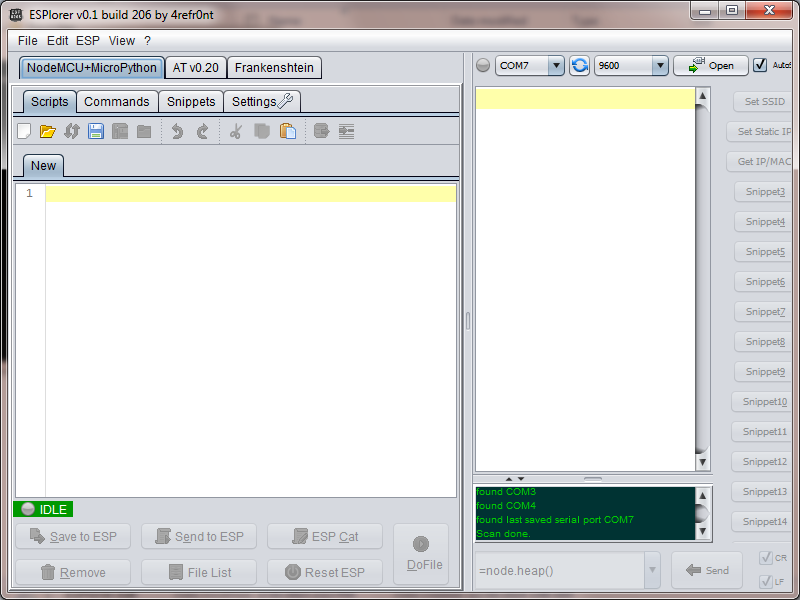
Simply run the batch file “ESPlorer.bat” to start the IDE. A command window will be launched along with the IDE GUI. DO NOT close the command window!
The ESP8266 starts up now with it’s serial port set to 9600 baud. In order to start the communication link, you will need to click on the “Open” button (COM port set to the number corresponding to the ESP8266 to PC serial bus).
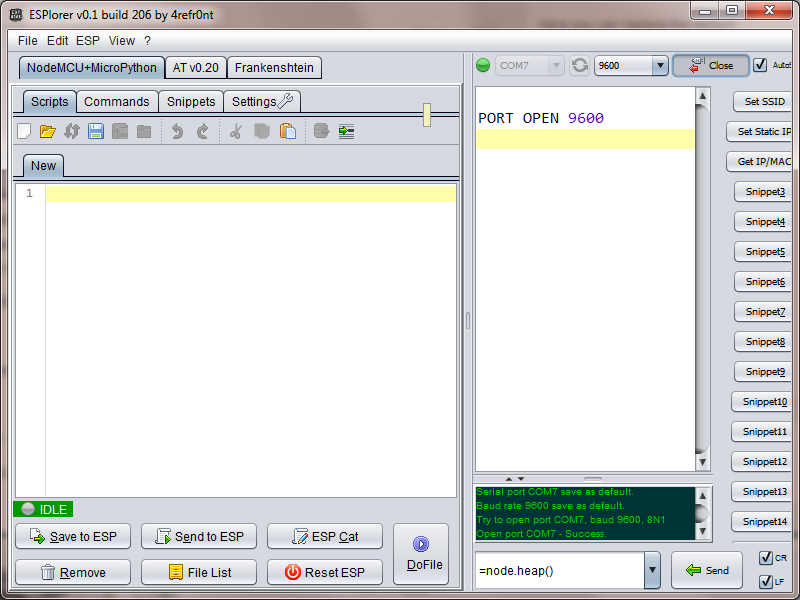
If the port opens successfully, the IDE window will look like this:
Now click on the “ResetESP” button. The ESP8266 should respond with the firmware version:
node.restart()
> #ü!##¤„ÿ1ä)Mô1ä)}†1¤ñ¡Hø
NodeMCU 0.9.5 build 20150311 powered by Lua 5.1.4
>
Congratulations! Your ESP8266 development environment is now set up.
Step 5: Installing an application
It is time to write and flash our first program.
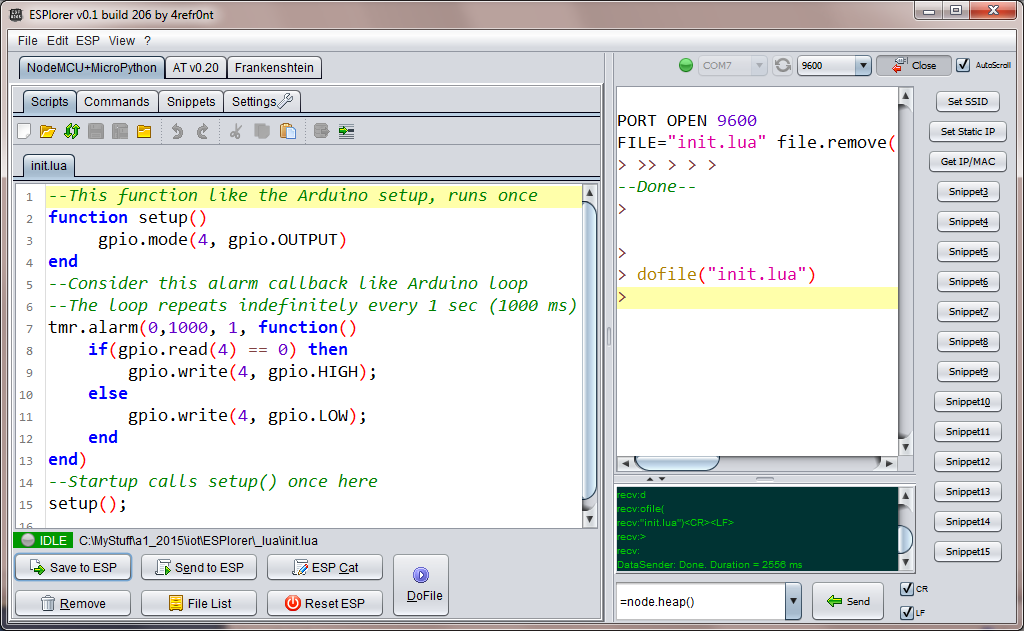
Lets try writing a simple program to blink an LED on and off. It is structure here to appear similar to the familiar Arduino structure. The code is entered in the window with the “Scripts” tab selected:
Notice the file is assigned the name “init.lua”. This is the default file that is run on the ESP8266 at start-up. This program simply toggles the LED state every 1 second. The GPIO2 is assigned an index 4, which is why this value is used in our script to control the connected LED. Look here for the remaining GPIO to index mapping. Simply click on the “Save to ESP” button to flash the code to the ESP8266. The LED should then change state every 1 second.
Also note the ‘dofile(“init.lua”)’ in the right window. The IDE commands the ESP8266 to start this script after flashing with this command.
NOTE: While it may change in the future, currently, the IDE does not provide a means to create new files to your PC. The file “init.lua” must be created with an external text editor before it can be opened in the IDE.
This is just the beginning… A starting point so you can begin exploring what is possible with this remarkable device. I have already made a simple server to control an LED from a web-page and return a JSON string. I’ll leave that as an exercise for you and perhaps provide the details in another post.
The complete API and GPIO index mapping is maintained here.
And there are examples of different code snippets, including configuring the ESP8266 WIFI for internet here.
I’ll be back with more as I get more experience with this device.
My next step is to port the code I have currently deployed to a Spark Core (running continuously for almost a year now) to the ESP8266-12 platform to compare performance.
What will you do next?
![]()
