
Your Personal http Server
If you would like to have your own personal web server, running industry standard software, all from a boot-able USB stick, read on…
One of the most useful tools for home automation and web development is a host server. And the most widely used server is of course, Apache.
This article marks the start of a 5-post series that provides step-by-step instructions for setting up your own USB memory stick based http server. We’ll start with the basic LAMP stack in the first three articles, and then add-on some extras to extend the functionality.
What’s LAMP?
LAMP covers the essential ingredients of a web server:
- Linux – The operating system
- Apache – http server
- mySQL – database
- PHP – server-side scripting language
Here are the topics planned for this series:
- Part 1 – Setting up the Linux Apache Server
- Part 2 – Adding php to your Web Server
- Part 3 – Completing the LAMP with mySQL
- Part 4 – phpMyAdmin for mySQL administration
- Part 5 – WordPress
Update: Bonus Topics
- Part 6 – Code Compiler
- Part 7 – MQTT Broker (Not Yet Published)
Part 1 – Setting up the Linux Apache Server
When finished with part one, you will have the LA (Linux and Apache) LAMP components up and running.
Let’s get to it…
Prerequisites
- Blank USB Memory stick (4GB minimum)
- PC with USB port that can be dedicated for the server
While I cannot claim to be a Linux expert, I do have some experience working with the single user Puppy Linux distribution. Being a familiar setting, that is what was selected for this exercise.
But hold on, before you start there is one more selection to make….
You see, there are several versions of Puppy Linux to pick from. My first attempt at this used the most current version, called Slacko Puppy 6.3. However….sparing you the details, I ran into some insurmountable obstacles to completing a successful installation of Apache server with Slacko Puppy.
So I moved on to a Puppy Linux version that works with the Apache Server.
The version that worked is called Precise Puppy 5.7.1
Installing the Linux Operating System
As with many Linux distributions, the installation is really quite simple. Just download the ISO image and a USB installer. That’s it. Here is where you can get both:
Now for the installation. Just install your USB stick and start the installer program. The start up screen will provide 3 easy-to-follow instruction steps.
- Select the distribution (Select “Precise Puppy”)
- Select the iso file (from the folder that has the downloaded ISO image)
- Select the USB stick drive letter.
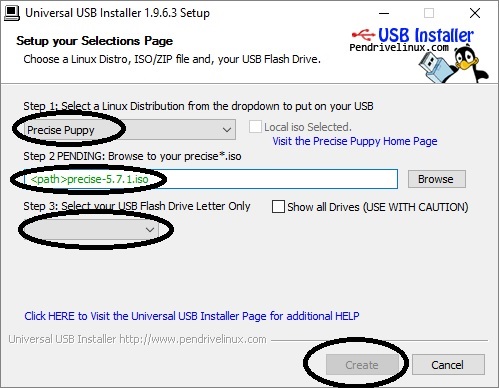
Then click on the “Create” button to start the installation.
Once the installer is finished, you can boot any PC to the newly installed Puppy Linux simply by putting this memory stick in the PC’s USB port and rebooting (Boot to USB first must be selected in the bios first, of course).
After the computer has booted to Linux and you have completed the self-guided first boot process, you need to perform one additional step before installing Apache.
NOTE: It is recommended that a wired internet connection be used for this and all processes during installation.
First, you need to update the package database. This is a very simply process. Just launch the Puppy Package Manager (Menu->Setup->Puppy Package Manager) and click on the “Configure package manager”. A window will appear with an “Update now” button.
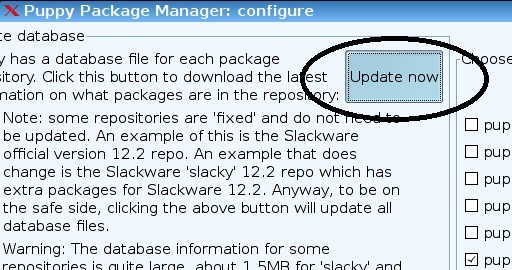
Click that button and press enter each time the yellow window prompts you. There will quite a few “Enter”s required to complete this step.
Once complete, exit the Puppy Package Manager. If this is still your first Linux session using the memory stick, it is also recommended that you restart the computer (from the bottom MENU option). The restart will create a save file that will be updated every time you exit Linux. This file contains all the changes you have made to the originally installed Linux distribution.
Adding Apache Server
Now let’s get Apache.
Launch the Puppy Package Manager again. In the search window (Find), enter “apache2”.
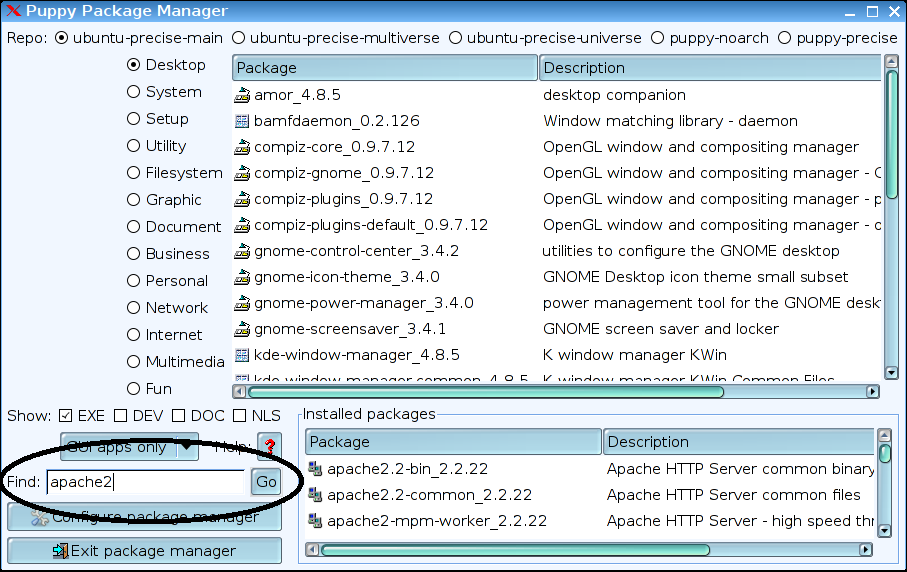
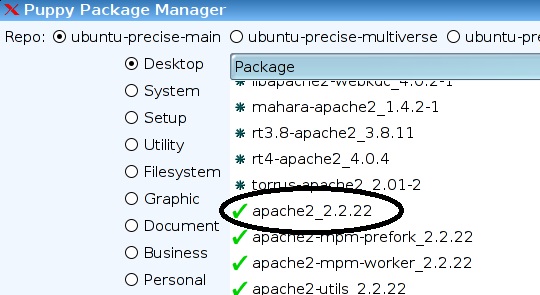
Select “apache2_2.2.22” from the listed results.
A pop-up windows will appear as shown below:
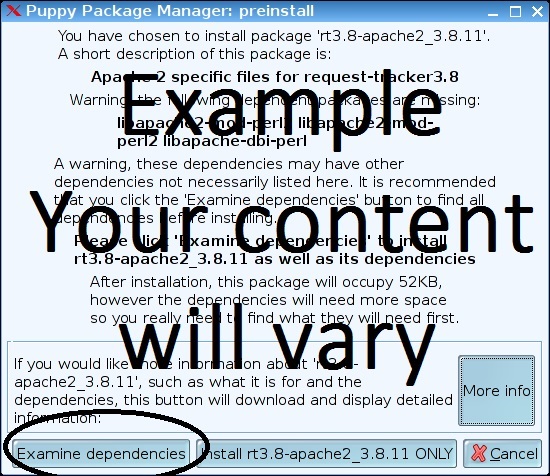
Click the “Examine dependencies” button.
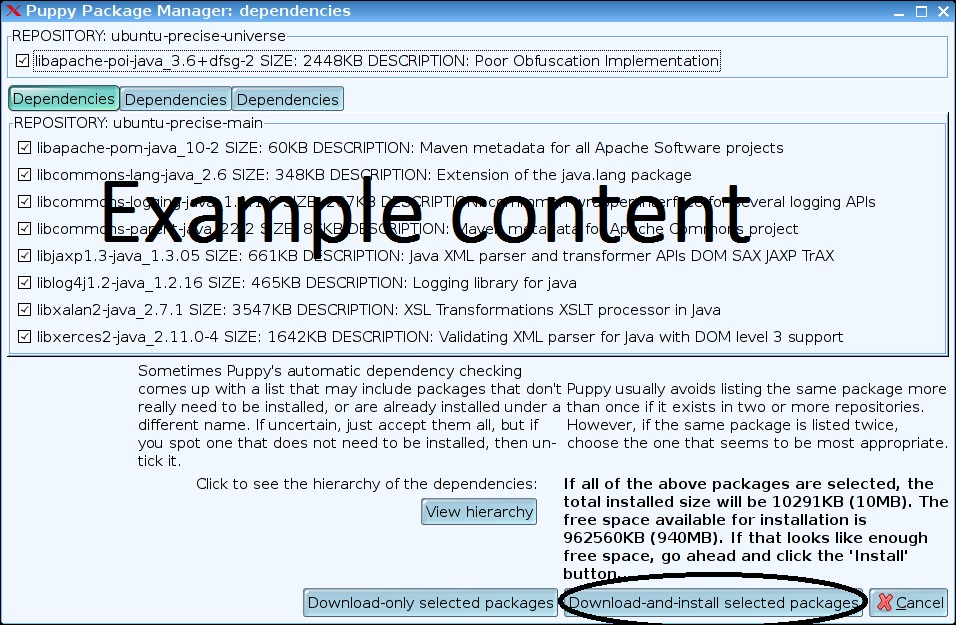
Click “Download-and-install selected packages” in the window below.
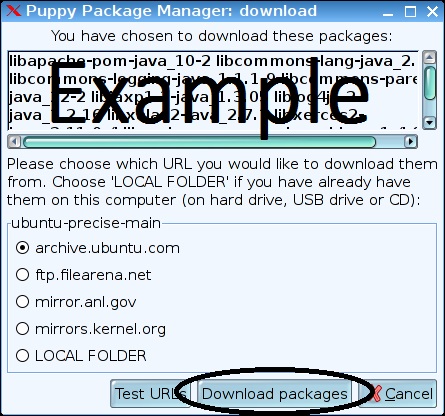
Another window will appear. Click “Download packages” in this window.
Manual Apache Server Installation Steps
Once the download is complete, we are ready to make the necessary adjustments in order for the server to properly start. We will be adding a new user and add links to the files and directories the Apache server is expecting.
Open a terminal by clicking on the desktop icon “console”.
In the console window, enter the following lines. End each line with the <Enter> key. The entries are shown in red text:
# adduser www-data
adduser: /home/www–data: No such file or directory
Changing password for www–data
New password:
Retype password:
Password for www–data changed by root
Note that <enter> is pressed with no entry for the password.
Now lets continue with the next lines:
# touch /etc/apache2/httpd.conf
# ln -s /etc/apache2/mods-available/auth* /etc/apache2/mods-enabled/
# ln -s /etc/apache2/sites-available/default /etc/apache2/sites-enabled/
# ln -s /etc/apache2/mods-available/alias* /etc/apache2/mods-enabled/
# ln -s /etc/apache2/mods-available/ldap* /etc/apache2/mods-enabled/
# chown www-data:www-data /var/www
# touch index.html
# chown www-data:www-data /var/www/index.html
# ln -s /etc/apache2/mods-available/dir.* /etc/apache2/mods-enabled/
Server Test Page
Lets put the typical “hello world” message in our index.html file so we know it is served properly.
The file is in the /var/www directory, which is the apache server root folder. Open that file and fill it with the following text:
 <html>
    <body>
        <h1>Hello World!</h1>
    </body>
</html>
Now there are only two more things needed to complete the server installation:
1. Set the IP
2. Set the Listening Port
Setting the IP
From the terminal, enter (a wired network cable should be installed):
# /sbin/ifconfig eth0
The computer will respond with several lines. The second line should contain the ip. My second line began with:
inet addr:192.168.0.110
This IP value needs to be added to the hosts file. It is at /etc/hosts.
The first line should be:
127.0.0.0 localhost <your computer id>
Change it to (using your IP value):
192.168.0.110 localhost <your computer id>
You can now save and close the hosts file.
Setting the Listen Port
Now lets finish this off by setting the server listening port. If you want to leave the server listening on the default port (80), you can skip this step.
Open the file: /etc/apache2/ports/ports.conf
Near the top of the file, you will see the following 2 lines:
NameVirtualHost *:80
Listen 80
Change “80” in these lines to whatever port you want the server to listen on.
Save and close this file.
Now open the file: /etc/apache2/sites-enabled/default
The top line should be:
<VirtualHost *:80>
Change “80” in this line to the same port number in the first file.
Save and close this file.
Testing the Apache Server
First, start the server by entering the following in a console window:
/etc/init.d/apache2 restart
The console should respond with:
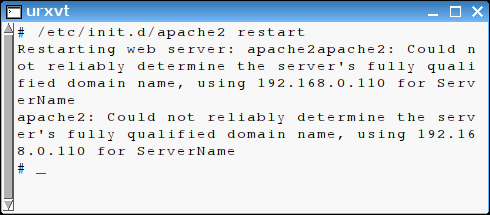
Now, using a web browser from a different computer on your network, enter (replacing 80 with the port number configured in the previous step):
192.168.0.110:80
The browser response should be (my listen port was 9777):
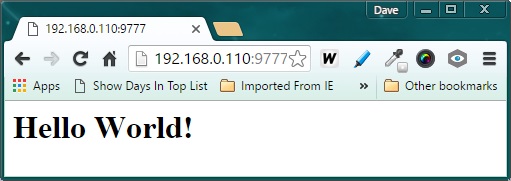
Congratulations! Your Apache Server is now functional.
This is an enormous first step. You can now serve html files from this server, both within your local network and globally from anywhere on the planet!
In Closing
This is not the end, it is only the beginning of your own host server. I will share my setup as the components are added. Part 2, adding PHP to the server will be coming soon.
I hope you find this information useful…