
My last post completed the USB LAMP web server. And at this point, the server already has the powerful essential foundation. Here is what we have so far.
- Part 1 – Setting up the Linux Apache Server
- Part 2 – Adding php to your Web Server
- Part 3 – Completing the LAMP with mySQL
But there is still a need for at least one additional tool to fully utilize the mySQL server. The basic functions of creating and deleting databases, creating tables and stored procedure, and importing and exporting data and SQL require an admin tool.
And while there are some third-party tools available to externally support database administration (my favorite is mySQL Workbench), there is still a need for an embedded tool accessible on the server computer.
So here we go the installation of one of the most common mySQL administration tools on the USB LAMP server, phpMyAdmin.
And, just like with my last post, for those who do not want to go through all the setup steps, a Linux session save file is included with this post.
Simply replace your existing save file with this one and you will be 99% complete with a web server that supports both php and mySQL server. Here it is. You can also refer to my Quick and Easy section from the previous post on this series for minimal installation steps.
But if you would like to understand the steps to installing phpMyAdmin on the USB Precision Puppy Linux setup, read on.
Adding phpMyAdmin to the USB Web Server
Start the USB installed Precision Puppy Linux from part 3. Then launch the Puppy Package Manager. In the search window (Find), enter “phpMyAdmin” and search all repositories.
Select phpmyadmin_3.4.10.1-1.
Then click “Examine dependencies” and “Download and install selected packages”.
And as with other packages, there are a few post-installation steps required. After the installation has completed, open a console windows and enter:
# ln -s /etc/phpmyadmin/apache.conf /etc/apache2/conf.d/phpmyadmin
# ln -s /etc/apache2/mods-available/mime* /etc/apache2/mods-enabled/
Now, to enable initial access to phpMyAdmin, passwordless logins need to be enabled. This is easy. Just open the file:
/etc/phpmyadmin/config.inc.php
Un-comment the line:
//$cfg[‘Servers’][$i][‘AllowNoPawwords’] = TRUE;
Testing phpMyAdmin
In order to access phpMyAdmin, the mySQL server must be running. And to start mySQL, you must know the IP of the computer hosting the server. This should already be known from installing parts 1-3. This is the same IP that should be in the host file.
A quick refresher…
Identify the IP :
From a console, enter:
# /sbin/ifconfig eth0
The computer will respond with several lines. The second line should contain the ip. My second line began with:
inet addr:192.168.0.11
The host file: /etc/host
Now lets start the mySQL and apache servers and test the phpMyAdmin installation:
Start the mySQL Server:
From a console, enter:
# mysqld –bind-address 192.168.0.11
Start Apache Server:
From a second console, enter:
# /etc/init.d/apache2 restart
Now go to another computer on your network and enter the following URL from a browser to start phpMyAdmin:
http://192.168.0.11:9777/phpmyadmin
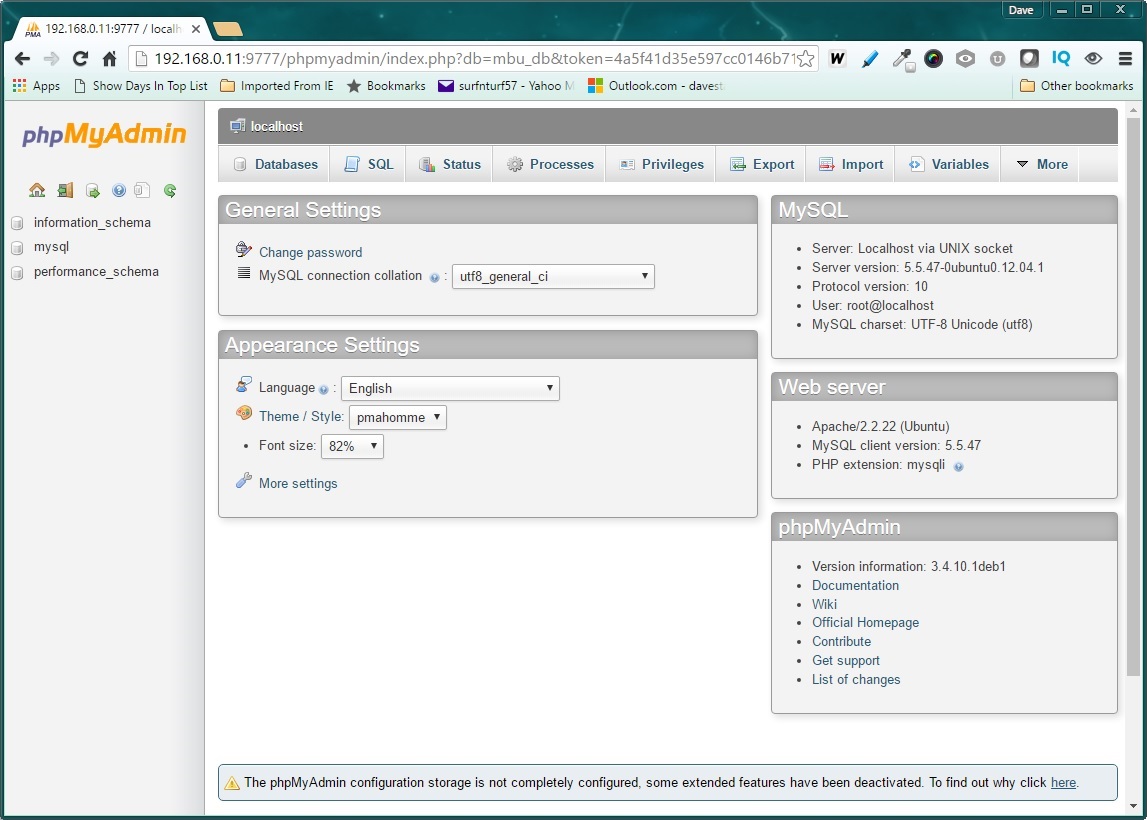
The following initial screen should appear:

Use the Username “root” with no password and enter “Go” to begin the phpMyAdmin session.
The opening screen will look similar to this:
Configuring phpMyAdmin
If you wish to add more users with password logins, click on the “Privileges” tab at the top of the phpMyAdmin screen. You will see a link to “Add a new User”.
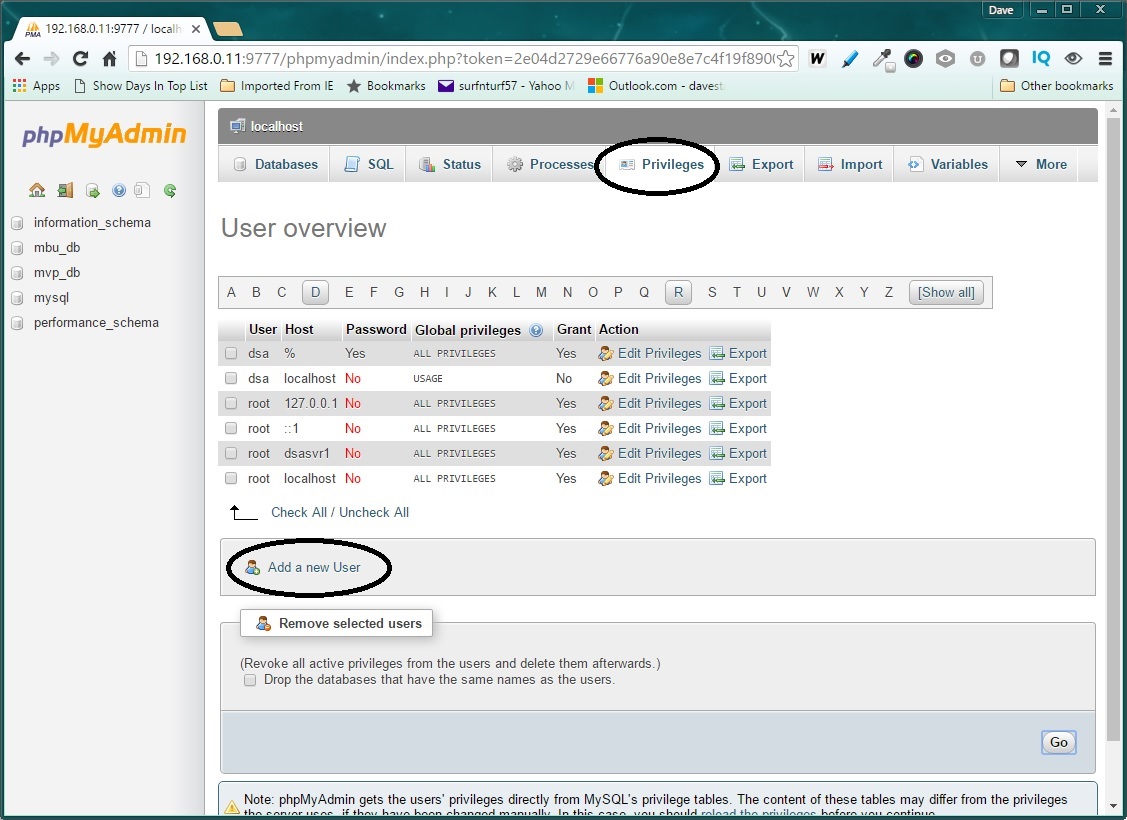
After creating a new user, remember to set the user privileges (Use “edit Privileges” link) so that the user can gain access to selected databases and functions.
There is plenty of information available on-line on how to configure the phpMyAdmin utility. Just look for it.
phpMyAdmin Limitations
Note that this version of phpMyAdmin is 3.4.10. After using version 4.0.7 for a significant period of time, this older version lacks some of the features I had become used to being available. In fact, the only purpose to use this version of phpMyAdmin is to add and delete users, create databases, and import tables and procedures.
Essential functions, but you will need more…
Still, I have found that even though the version of phpMyAdmin that is available with Precision Puppy is somewhat dated, it is sufficient for basic database administration. However, it is recommended once your database and users are initially setup with phpMyAdmin, subsequent table generation and stored procedure development use a third party tool. As noted earlier in this post, my favorite is the open-source MySQL Workbench.
In Closing
This series should provide a great reference for anyone setting up a web server, either now or in the future. The server provides an excellent platform for several uses, including system development and test, learning about server configuration and capabilities, and even for deployment of a permanent installation.
There is just one more addition planned for the USB LAMP server…
The addition of the popular WordPress content management system (CMS). Stay tuned for that post coming soon.