![]()
Alas we come to the final installment of this 5-part series. Last but not least, let’s install WordPress on our private USB-based LAMP server. And in case you just joined us, here is a link to the first part, which also provides references to all the other pieces to this puzzle.
WordPress is the most widely used Content Management System (CMS) used today. As of April, 2016, 22% of all new website use WordPress. With all the options available today, that is impressive market penetration!
Major Shortcut!!!
And, just like with my last post, for those who do not want to go through all the setup steps, a Linux session save file is included with this post.
Simply replace your existing save file with this one and you will be 99% complete with a web server that supports both php and mySQL server. Here it is.
Now let’s get to the step-by-step instructions…
Adding WordPress to the USB Web Server
Step 1: Installing the WordPress Package.
Start the USB installed Precision Puppy Linux from part 4. Then launch the Puppy Package Manager. In the search window (Find), enter “wordpress” and search all repositories.
Select wordpress_3.3.1 (or higher revision if available).
Then click “Examine dependencies” and “Download and install selected packages”.
Now close and restart the Puppy Package Manager. In the search window (Find), enter “php5-gd” and search all repositories.
Select php5-gd_5.3.10 (or higher revision if available)
If the Description says “ALREADY INSTALLED”, then quit Puppy Package Manager
and continue to the next step.
Otherwise, click “Examine dependencies” and “Download and install selected packages”.
Step 2: Create a WordPress Database and user in mySQL.
Start the mySQL server and open 2 console windows.
In the first windows, start the mySQL server by entering (adjust IP to your conversion):
# mysqld –bind-address 192.168.0.11
In the second widow, start the Apache Server by entering:
# /etc/init.d/apache2 restart
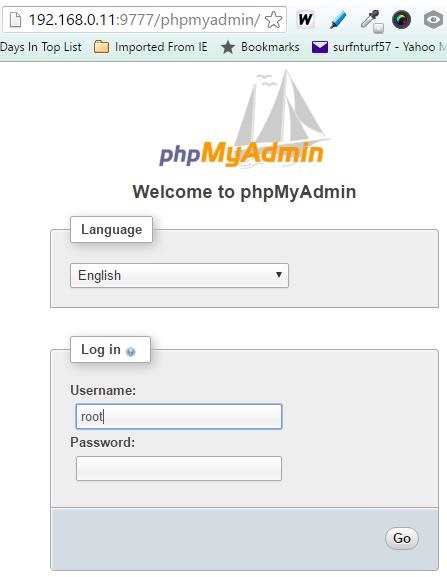
On another computer on the same network as the LAMP server, enter the following in a web browser:
http://192.168.0.11:9777/phpmyadmin/
Use the Username “root” with no password and click “Go” to enter phpMyAdmin, the mySQL database administration tool installed in part 4 of this series of USB LAMP server articles.
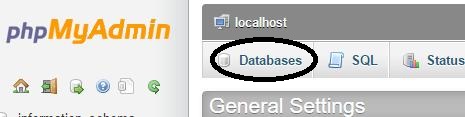
From the page that is now displayed, click on the databases tab.
Now lets create a database called “wordpress” to check out our installation. Enter “wordpress” for the database name and click “Create”:
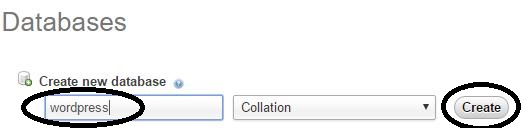
The new database will appear in the list of databases. We are now going to link a user to this database. Click “Check Privileges”.
![]()
Then click “Add a new user”.
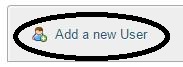
Enter “demowpuser” in the “User name”, “Password”, and “Re-type” fields. Then click “Go” at the bottom of this page.
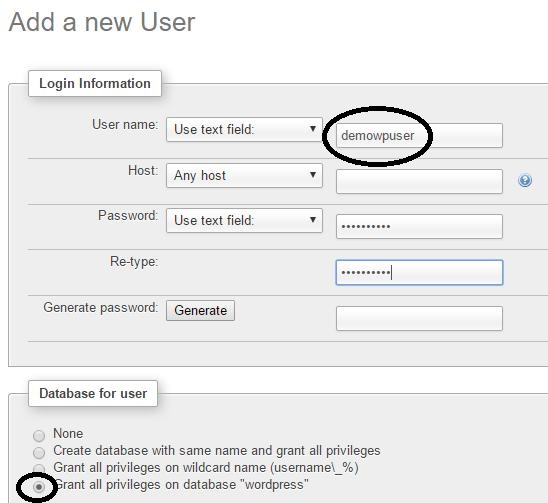
This demo WordPress database setup is now complete.
Step 3: Get the WordPress files.
The WordPress files can be downloaded either from a separate computer or the USB LAMP server. Assuming you are using the USB LAMP server:
Open the Puppy Linux Web Browser by clicking on the “browse” icon on the desktop. Then got to the URL: https:/wordpress.org/download.
Click “Download WordPress”.
Save the zip file to “/mnt/home”.
Using the Pupply Linux file Manager (Menu>Filesystem>ROX-Filer file manager), navigate to “/mnt/home” and click on the WordPress zip file that was downloaded.
Right-click on the “wordpress” folder and select “Extract”.

Enter “/var/www” as the “Directory to extract to”.
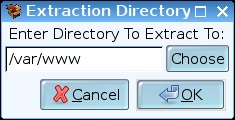
Click “OK”.
Step 4: Setup the WordPress Configuration
Using the ROX-Filer file manager, navigate to “/var/www/wordpress”.
Open the file “wp-config-sample.php” (right-click on it and select “Open as Text”).
Find the section that contains:
// ** MySQL settings - You can get this info from your web host ** //

/** The name of the database for WordPress */

define('DB_NAME', 'database_name_here');
/** MySQL database username */
define(‘DB_USER’, ‘username_here’);
/** MySQL database password */
define(‘DB_PASSWORD’, ‘password_here’);
Change it to:
// ** MySQL settings - You can get this info from your web host ** //

/** The name of the database for WordPress */

define('DB_NAME', 'wordpress');
/** MySQL database username */
define(‘DB_USER’, ‘demowpuser’);
/** MySQL database password */
define(‘DB_PASSWORD’, ‘demowpuser’);
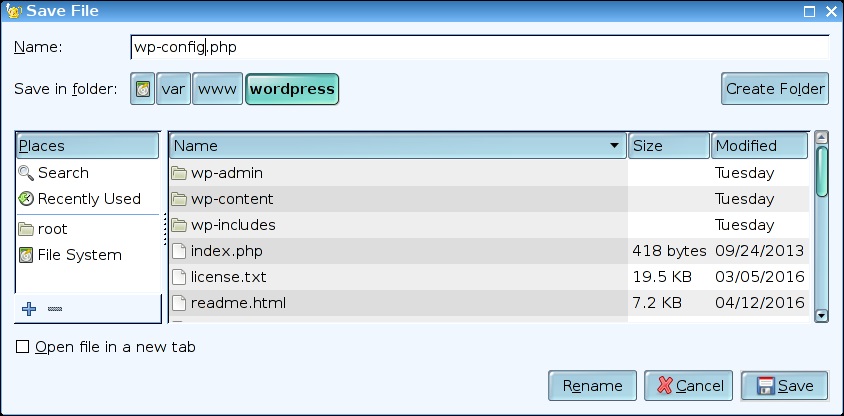
Save the file as wp-config.php and exit the file
Step 5: Set folder permissions
Open a console window and enter:
# chmod -R o777 /var/www/wordpress
Step 6: Setting up your installation
Start your mySQL database and Apache servers:
- Open two console windows from Puppy Linux
- In the first window, start the mySQL database server by entering:
# mysqld –bind-address 192.168.0.11
- In the second window, start the Apache Server by entering:
# /etc/init.d/apache2 restart
Now a web-browser on your network.
Assuming the Apache Server IP is: 192.168.0.11 (Change per your installation)
and the Apache listening port is 9777 (Change per your installation)
Enter the URL:
http://192.168.0.11:9777/wordpress/wp-admin
The screen should look similar to the following:
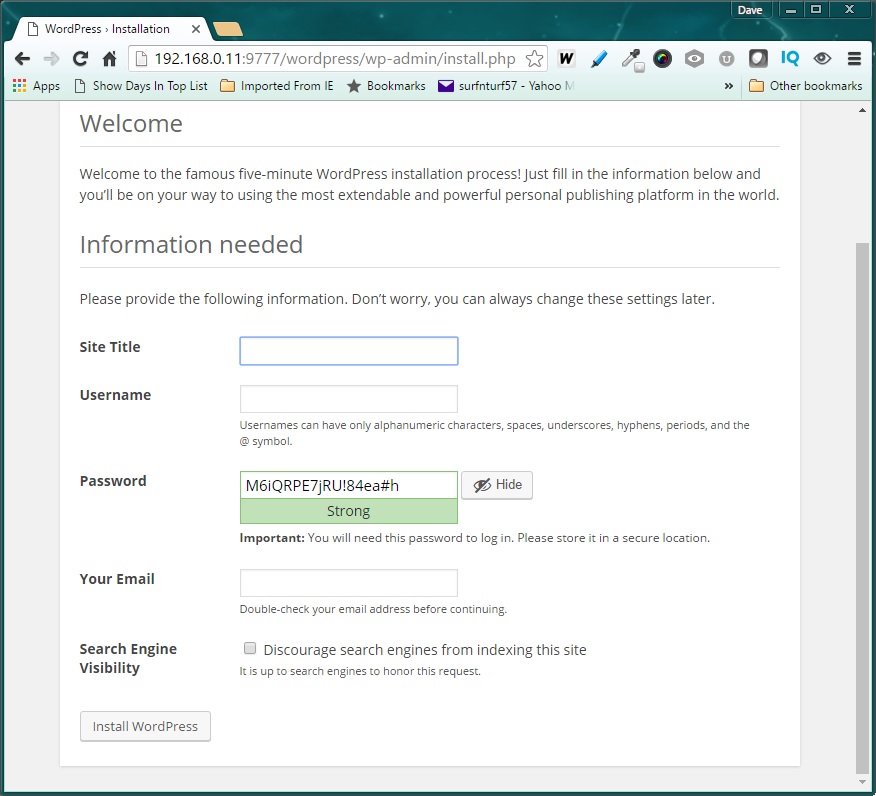
Congratulations, if you made it this far, your LAMP WordPress installation is successfully completed!
After filling out the form and clicking “Install WordPress”, you should receive a “Success! Prompt, indicating the installation is finished. Click “Login” to open the WordPress Login page.
From here, you can perform any and all of the actions the WordPress content management system offers. Like picking a theme, adding plug-ins, writing and posting blog entries, etc.
You can even copy an existing WordPress site to your USB LAMP server, copying the folder to the Apache server root folder:
/var/www/<YOURWORDPRESSFOLDER>
For more information, just look on-line at wordpress.org or the wealth of information available through a google search. Here is a great place to start.
In Closing
That’s it! If you have completed all 5 parts of this series, you now have a solid server platform to work from. What is great about this setup is that it is portable. Allowing you to run it anywhere, on any i386 computer.
I hope this information serves as a practical guide and reference for all that come across it…